Thinking about renovating your kitchen? You’re in good company. The kitchen is consistently the most renovated room in Australian homes — and for good reason. A well-planned kitchen renovation can transform your daily life, boost your home’s value, and make cooking actually enjoyable.
But here’s the thing: the difference between a renovation that goes smoothly and one that blows the budget usually comes down to planning. The more thought you put in before a single tile is laid, the better the outcome.
In this guide, we’ll walk you through every step of planning a kitchen renovation in Melbourne — from setting your brief to signing off on the final build.
Step 1: Get Clear on Why You’re Renovating
Before you dive into Pinterest boards and tile samples, take a moment to ask yourself what you actually need from your new kitchen. Are you cooking for a growing family and desperately need more bench space? Is the layout awkward and you want it to flow better? Or are you preparing to sell and want something that appeals to buyers?
Your ‘why’ will shape every decision that follows — from how much you spend to which features you prioritise. Write it down. It’ll keep you grounded when you’re standing in a showroom being tempted by a $4,000 rangehood.
Step 2: Set Realistic Budget

Kitchen renovations in Melbourne typically range from $20,000 for a modest refresh to $80,000+ for a full custom transformation. Most mid-range renovations land between $25,000 and $45,000.
A good rule of thumb: spend no more than 5–10% of your home’s value on a kitchen renovation if you want a solid return on investment. That said, if you’re planning to stay for 10+ years, spending a bit more for a kitchen you truly love makes perfect sense.
Set your budget early, add a 10–15% contingency buffer, and be honest with yourself about what you can afford. Your renovator will thank you — and so will your bank account.
| 💡 Budget Tip Always hold back a 10–15% contingency fund. Unexpected costs — like old plumbing that needs updating or waterproofing issues under old tiles — are common and rarely cheap. |
Step 3: Assess Existing Kitchen
Walk through your current kitchen and take stock of what’s working and what isn’t.
Consider –
- Layout — does the flow make sense for how you cook?
- Storage – do you have enough, and is it in the right spots?
- Bench space – is there enough for meal prep?
- Lighting – is it adequate, especially over the cooktop and sink?
- Appliances – what’s staying, what’s going?
Take photos and measurements. You’ll refer to these constantly throughout the process.
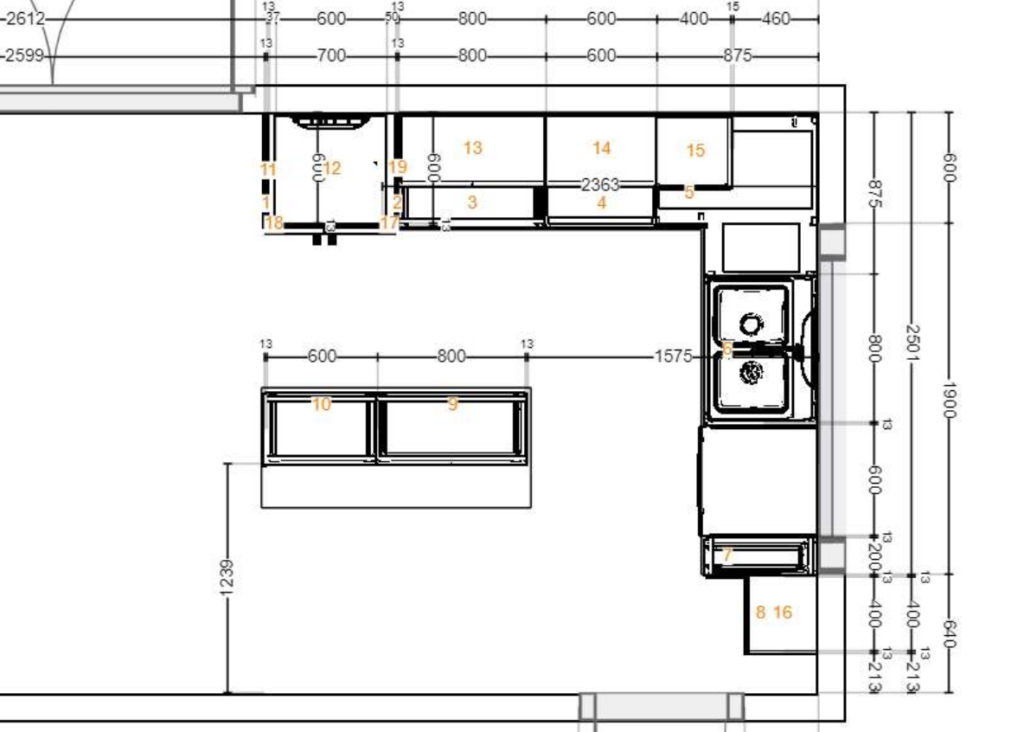
Step 4: Choose Your Layout
The layout is the most important functional decision in a kitchen renovation. The most common options are:
Galley Kitchen
Two parallel runs of cabinetry facing each other. Excellent for compact spaces and surprisingly efficient for cooking. Works beautifully in terrace homes across Richmond and Fitzroy.
L-Shaped Kitchen
Cabinetry along two adjoining walls. Great for open-plan living as it creates a natural corner for the work triangle (sink, cooktop, fridge).
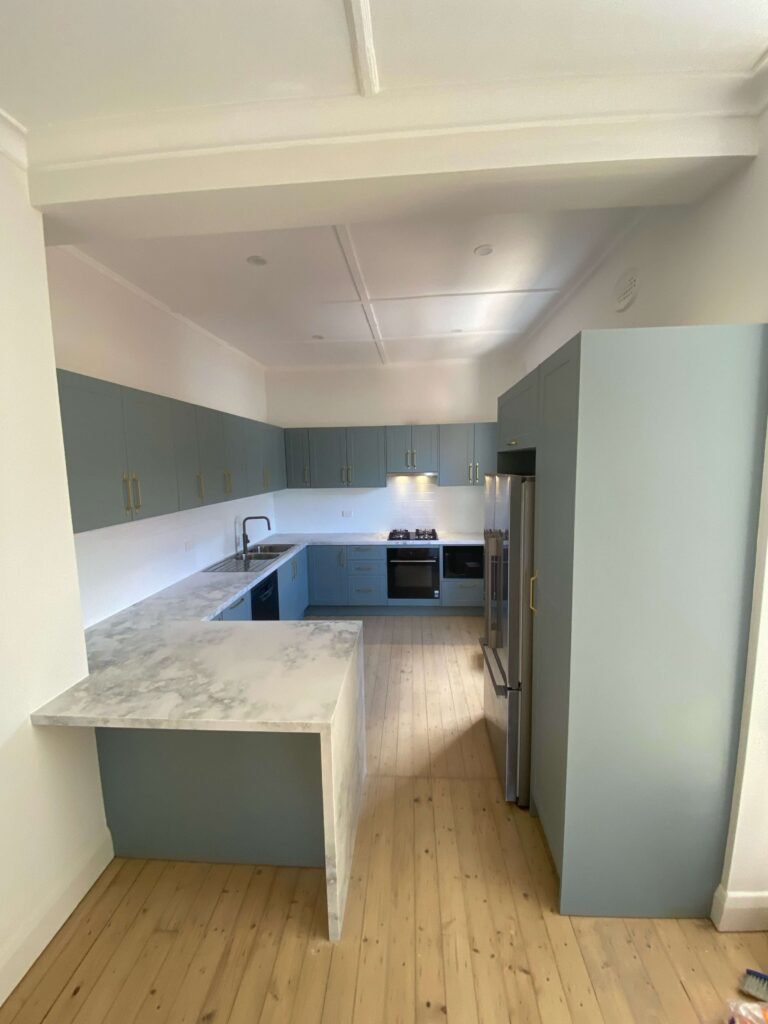
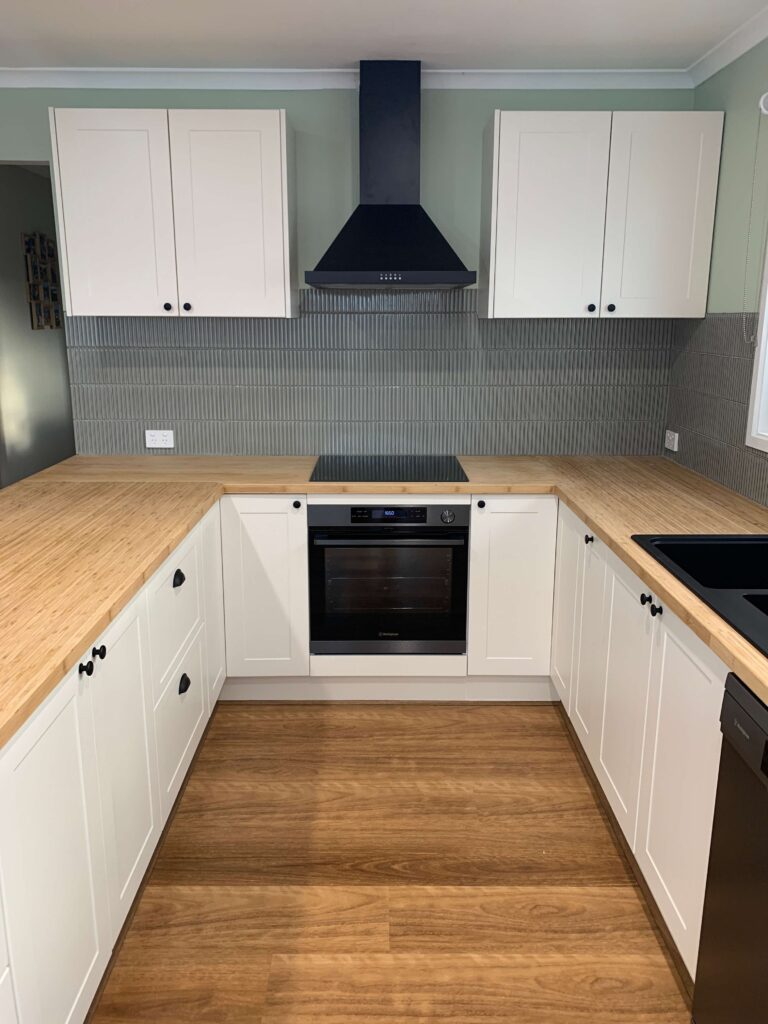
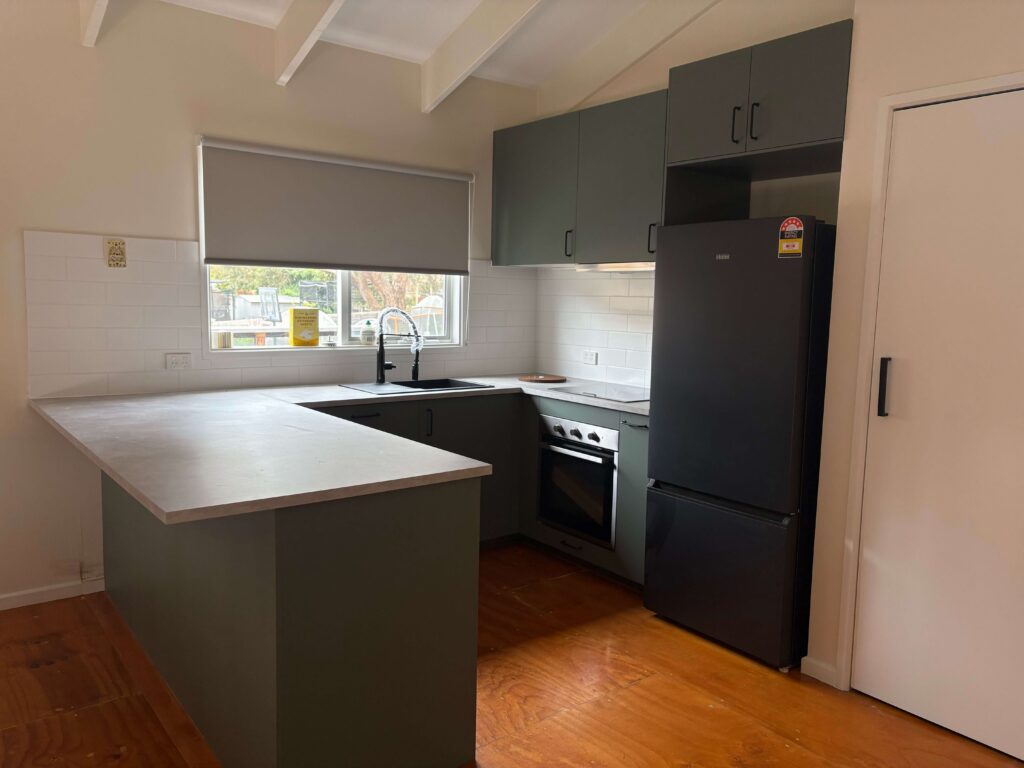
U-Shaped Kitchen
Three walls of cabinetry. Maximum storage and bench space — ideal for keen cooks. Needs a larger footprint to avoid feeling cramped.
Island Kitchen
An L or U-shape with a freestanding island bench. The most social kitchen layout — great for families and entertainers. Factor in at least 900mm of clearance around the island.
Step 5: Decide What You’re Keeping vs Replacing
Not everything needs to be replaced. Keeping your existing layout (plumbing and electrical in the same positions) is one of the most effective ways to manage costs. If your cabinets are solid, you might only need new doors and benchtops.
However, if your layout isn’t working, moving plumbing or walls may be worth the added cost in the long run.
Step 6: Choose your style and materials

This is where the fun begins! Gather inspiration from Houzz, Pinterest, and Instagram. Save images that speak to you — not just individual elements, but whole kitchens you love. You’ll start to notice patterns in what appeals to you.
Key decisions include:
- Cabinet style: shaker, flat panel, or handleless
- Benchtop material: stone, laminate, timber, or porcelain
- Splashback: tile, glass, or stone
- Flooring: timber, porcelain tile, or vinyl plank
- Hardware: handles, tapware, and sink style
Stick to a consistent palette. Three materials materials maximum for a cohesive look.
Step 7: Get Plans Drawn Up
Once you have a clear idea of your layout and style, it’s time to get professional plans drawn. Your kitchen designer or renovator can create detailed drawings that show cabinetry, appliance positions, electrical points, and plumbing locations.
These drawings are essential for getting accurate quotes and for council approval if you’re doing structural work.
Step 8: Step What Approvals You Need

Most kitchen renovations in Melbourne don’t require council permits. However, if you’re moving walls, changing the roofline, or doing significant structural work, you may need a building permit.
Your renovator will be able to advise you on what’s needed — but it’s worth asking upfront so there are no surprises.
Step 9: Get Quotes & Choose Your Renovator
Get at least 2–3 detailed quotes. Be wary of quotes that are dramatically lower than the others — this often means something has been left out.
When comparing quotes, look at:
- What’s included (and what isn’t)
- Timeframes and project management approach
- References and portfolio of past work
- Whether they use licensed trades for electrical and plumbing
A good renovator will ask you lots of questions, be transparent about costs, and communicate clearly throughout the process.
Step 10: Lock In Your Timeline

Kitchen renovations typically take 3–6 weeks from demolition to completion, depending on the scope. Allow additional time for:
- Lead times on cabinetry (often 6-10 weeks from order)
- Benchtop templating and fabrication (2-3 weeks)
- Appliance delivery
- Council approvals if required
Plan your temporary kitchen setup in advance — you’ll need a kettle, microwave, and somewhere to wash up. A laundry sink is your best friend during a kitchen reno!
You’re Ready To Begin
With a clear brief, a realistic budget, and the right team in place, your kitchen renovation is set up for success. The planning phase takes time, but every hour you put into it pays dividends when the build begins.
Ready to start planning your kitchen renovation? We’d love to help. Contact our team for a free, no-obligation consultation.
- WeDo are registered builders with 25+ years experience.
- All projects are managed by a dedicated project team.
- All projects are provided on a HIA building contact and include home warranty insurance where applicable.
Chat to us about your project.